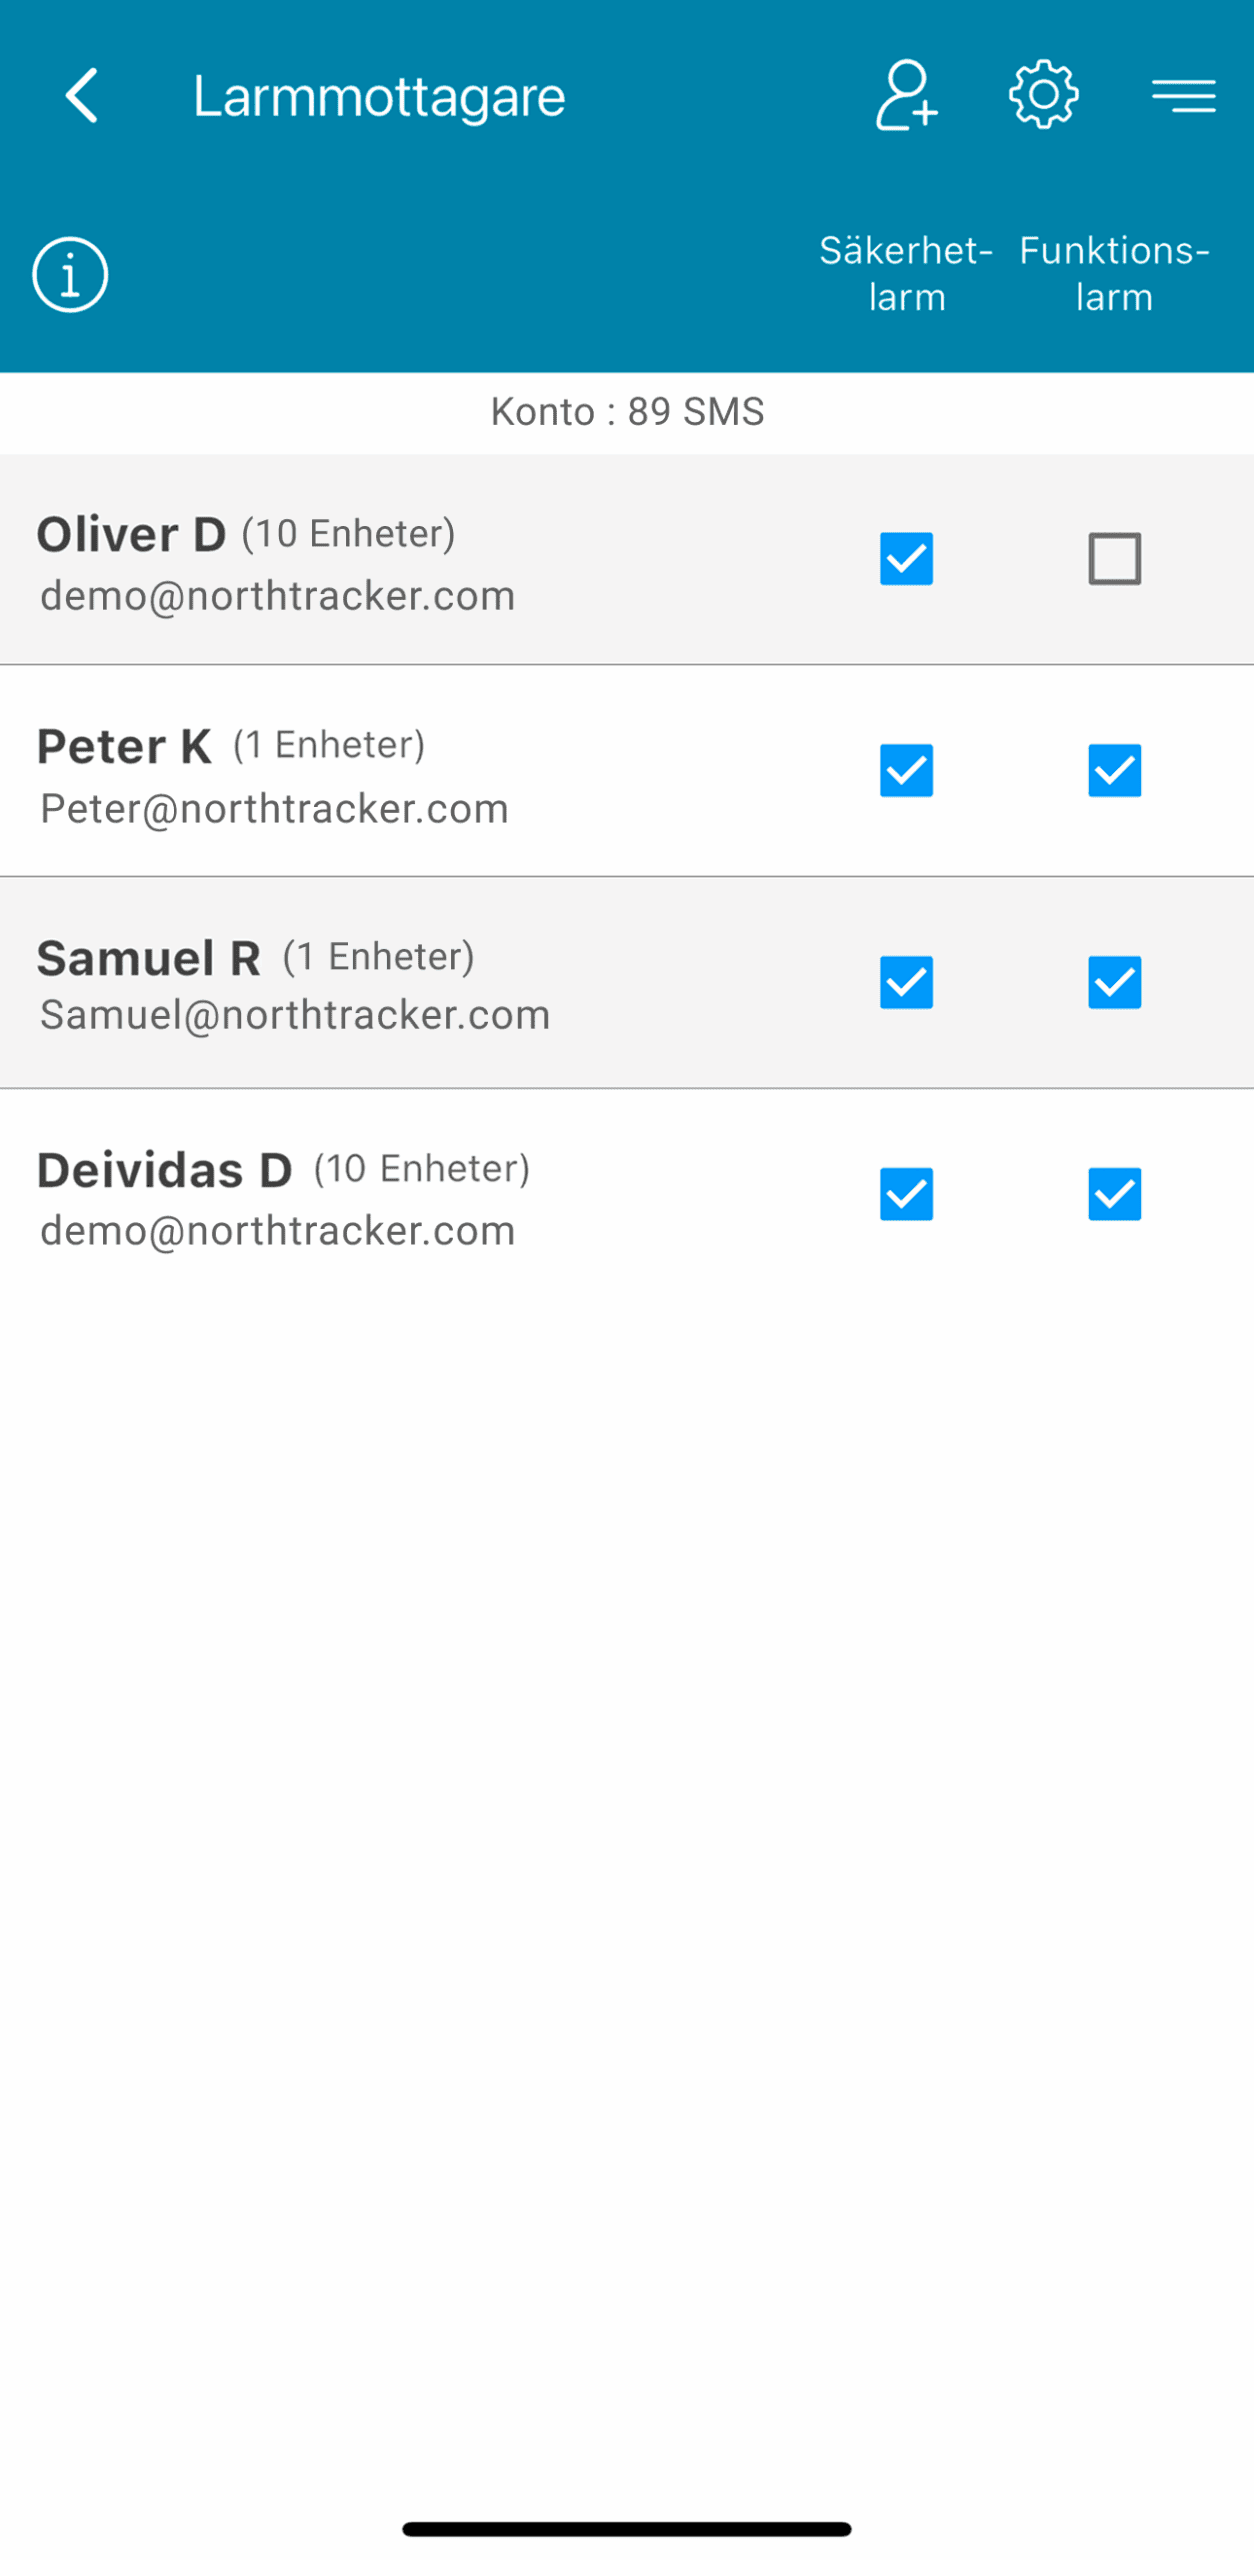
Get started with your account

Quick guide

Here is a step-by-step guide on how to set up your account with NorthTracker:

  1. First, download the app.

  2. Then register your account by following the on-screen instructions.

  3. You’re all set!

Additional feature tips we think you’ll find useful

Depending on which device you have chosen to install, there are different extra features available. Here are some general ones:

  1. You can add more users so multiple people can share the account and use its features.

  2. Create additional alarm recipients so alerts are sent to more people. You can add both users on the account and individuals who are not on the account – simply enter their email address and phone number.

If you have any questions, please contact NorthTracker Support.

1.  Download the app

2. Register account

  • Click “Register here”

  • Select “Company” or “Private”

  • Select country

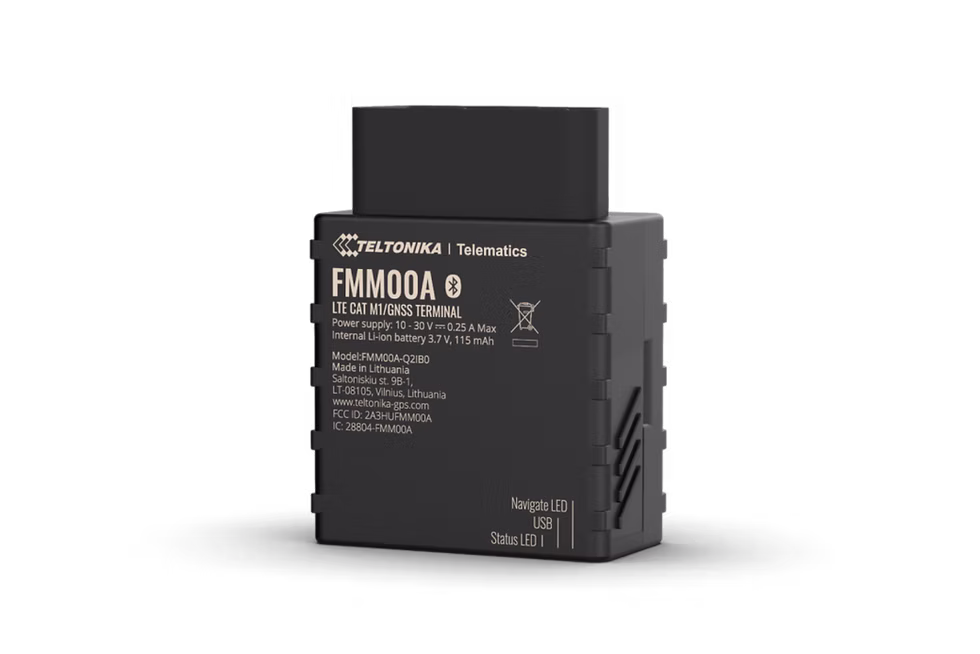
  • Enter IMEI or MAC ID (when registering in the app, you can use the camera to scan QR codes)

  • Enter where you purchased the device

  • Enter your company name (applies only if you selected company above)

  • Enter first and last name

  • Enter your email address

  • Enter your personal ID number (12 digits) / company registration number

  • Enter your address details

  • Enter your phone number

  • Create a password

  • Choose paper invoice or digital invoice (private customers only)

  • Verify that your details are correct

  • Read and accept the terms and conditions

  • Done

You have now set up your NorthTracker account, but there are more features we think you may want to use.

1. Add more users

  • Click the menu in the top right corner

  • Click Account

  • Click the person icon with the plus sign

  • Enter contact details and set permissions

  • Click Save

  • On the app’s home screen, click Device

  • Click Permissions

  • Select the user(s)

  • Click Save (All selected users can now monitor and edit the device)

  • DONE

Hur du lägger till fler användare i NorthTracker-systemet

2. Create an alarm recipient

  • Click the menu in the top right corner

  • Select Alarm Recipients

  • Click the + in the top right corner

  • Choose an existing user or create a new alarm recipient

  • Select where alarms should be sent (email/phone number – push notifications can only be sent to existing users)

  • Choose which alarms should be sent (security alarms/function alarms)

  • Click Save

  • Swipe the user profile to the left and select the devices the recipient should receive alarms from

  • Click Save

  • Done

Which device would you like to get started with?

Electronic Driving Log (OBD)
Here you can find how to get started with an OBD II device.
Equipment Control
Here you can find how to get started with equipment control.
Scout 2.0
Here you can find how to get started with a Scout 2.0.
Machine Connect
Here you can find how to get started with a Machine Connect.
Machine Easy
Here you can find how to get started with a Machine Easy.

If problems persist, contact NorthTracker support:
Tel: +46 (0)8 25 96 00
Email: info@northtracker.com

Subscribe to our newsletter

Don’t miss the latest updates, news or offers from us!
Your subscription could not be saved. Please try again.
Your subscription has been successful.

Get a price quote

Fill in your details and we'll get back to you

By filling in this form, you agree to us processing your data. Read more about how we handle your data here: Link to privacy policy

Get more info or a free price quote on the driving log

Fill in your details and we'll get back to you

By filling in this form, you agree to us processing your data. Read more about how we handle your data here: Link to privacy policy